Tiep Phan · · 11 min read
JavaScript · Lập Trình Angular · Programming · Web Development
Thử Nghiệm Với Angular Phần 19 - Custom Forms Validation Trong Angular
Custom Forms Validation Trong Angular
Trong các bài học trước của series Thử Nghiệm Với Angular chúng ta đã tìm hiểu về Forms trong Angular. Trong bài viết này chúng ta sẽ tìm hiểu về Custom Forms Validation trong Angular như thế nào.
Như các bạn cũng đã biết, Angular Forms là một tính năng rất mạnh mẽ. Bạn có thể dễ dàng tạo các form để thu thập dữ liệu của người dùng nhập vào. Cũng giống như các vấn đề của một form thông thường, chúng ta phải thực hiện xác minh xem người dùng có nhập vào đủ và đúng thông tin chúng ta yêu cầu không. Lúc này Forms Validation sẽ được sử dụng đến để thực hiện công việc xác minh này.
1. Built-in Validators
Angular Forms đã cung cấp đi kèm với các thành phần quan trọng khác như các models, directives là một số các Validators để thực hiện Validation như sau:
- required - Yêu cầu form control không được phép bỏ trống.
- minlength - Yêu cầu form control phải có value có length ít nhất bằng một giá trị nào đó.
- maxlength - Yêu cầu form control phải có value có length không vượt quá một giá trị nào đó.
- pattern - Yêu cầu form control phải có value thỏa mãn một pattern nào đó (Regex).
- nullvalidator - là một validator để dùng trong trường hợp bạn muốn luôn trả về form valid (được sử dụng trong trường hợp như thay đổi validator theo điều kiện nào đó).
Angular v4+
- email - Yêu cầu form control phải có value thỏa mãn định dạng của một email.
- requiredtrue - Yêu cầu form control value có
c.value === true. - min - Yêu cầu form control phải có value là số và nhỏ nhất bằng một giá trị nào đó.
- max - Yêu cầu form control phải có value là số và lớn nhất không vượt quá một giá trị nào đó.
2. Register Form
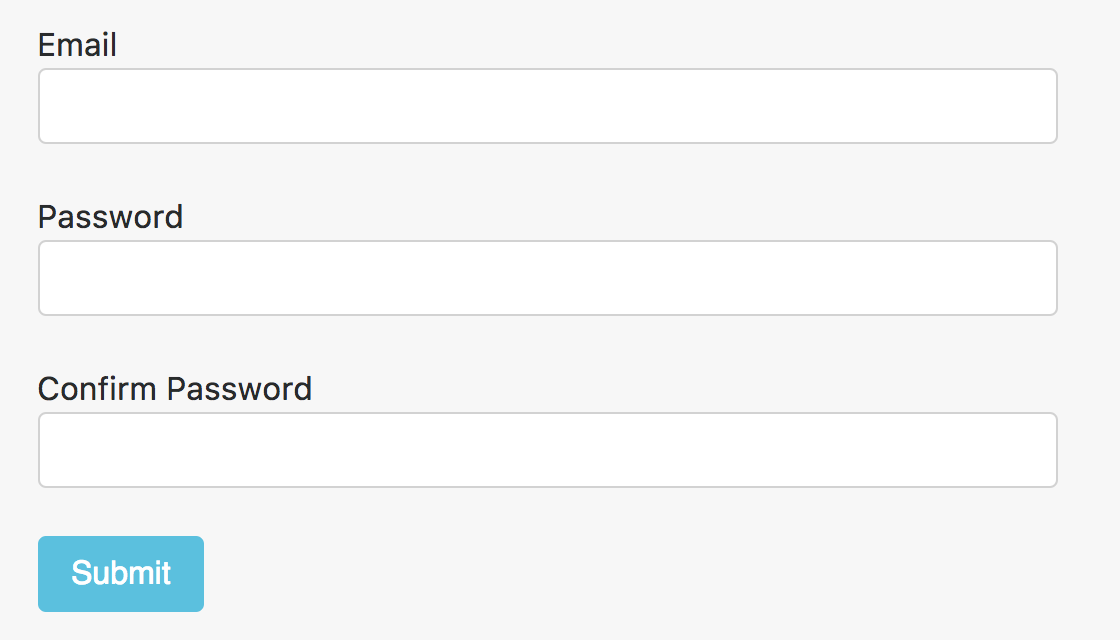
Trong bài này, chúng ta sẽ sử dụng một form để cho người dùng thực hiện tạo mới tài khoản vào hệ thống. Reactive Form Component sẽ có dạng như sau:
Template
<form [formGroup]="form" (ngSubmit)="onSubmit()"
  class="col-md-6 offset-md-3">
  <div class="form-group row">
    <label class="col">
      Email
      <input type="email" class="form-control"
        formControlName="username">
    </label>
  </div>
  <div class="col alert alert-danger" role="alert"
    *ngIf="form.hasError('invalidusername', ['username']) &&
      form.get('username').touched">
    Invalid Username!
  </div>
  <div formGroupName="pw">
    <div class="form-group row">
      <label class="col">
        Password
        <input type="password" class="form-control"
          formControlName="password">
      </label>
    </div>
    <div class="form-group row">
      <label class="col">
        Confirm Password
        <input type="password" class="form-control"
          formControlName="confirmPassword">
      </label>
    </div>
  </div>
  <div class="form-group">
    <button class="btn btn-info" type="submit">Submit</button>
  </div>
</form>
Component
@Component({
  selector: 'tpc-signup-rform',
  templateUrl: './signup-rform.component.html',
  styleUrls: ['./signup-rform.component.scss']
})
export class SignupRformComponent implements OnInit {
  form: FormGroup;
  constructor(private fb: FormBuilder) { }

  ngOnInit() {
    this.form = this.fb.group({
      username: ['', [Validators.required]],
      pw: this.fb.group({
        password: ['', Validators.required],
        confirmPassword: ['', Validators.required]
      })
    });
  }

  onSubmit() {
    console.log(this.form);
  }
}
3. Tạo Custom Validator Function
Custom Validator Function đơn giản là một function, nó nhận đầu vào là một đối tượng của abstract class AbstractControl sau đó sẽ tính toán để xem control đó có thỏa mãn điều kiện đưa ra hay không, và trả về:
- sync validator: một object thuộc type
ValidationErrorshoặcnull(viết theo TypeScript làValidationErrors|null). - async validator: một object thuộc type
Promise<ValidationErrors|null>hoặcObservable<ValidationErrors|null>.
Trong các ví dụ tiếp theo chúng ta sẽ làm quen với sync validator
export type ValidationErrors = {
  [key: string]: any
};

export interface ValidatorFn { (c: AbstractControl): ValidationErrors|null; }

export interface AsyncValidatorFn {
  (c: AbstractControl): Promise<ValidationErrors|null>|Observable<ValidationErrors|null>;
}
Bây giờ, chúng ta sẽ tạo một validator cho việc người dùng chọn một username bất kỳ, nhưng có một số username sẽ bị giới hạn, không cho phép họ chọn, ví dụ như admin hay manager, etc.
3.1 Simple Format
Validator Function của chúng ta sẽ có dạng như sau:
export function forbiddenUsername(c: AbstractControl) {
const users = ['admin', 'manager'];
return (users.includes(c.value)) ? {
invalidusername: true
} : null;
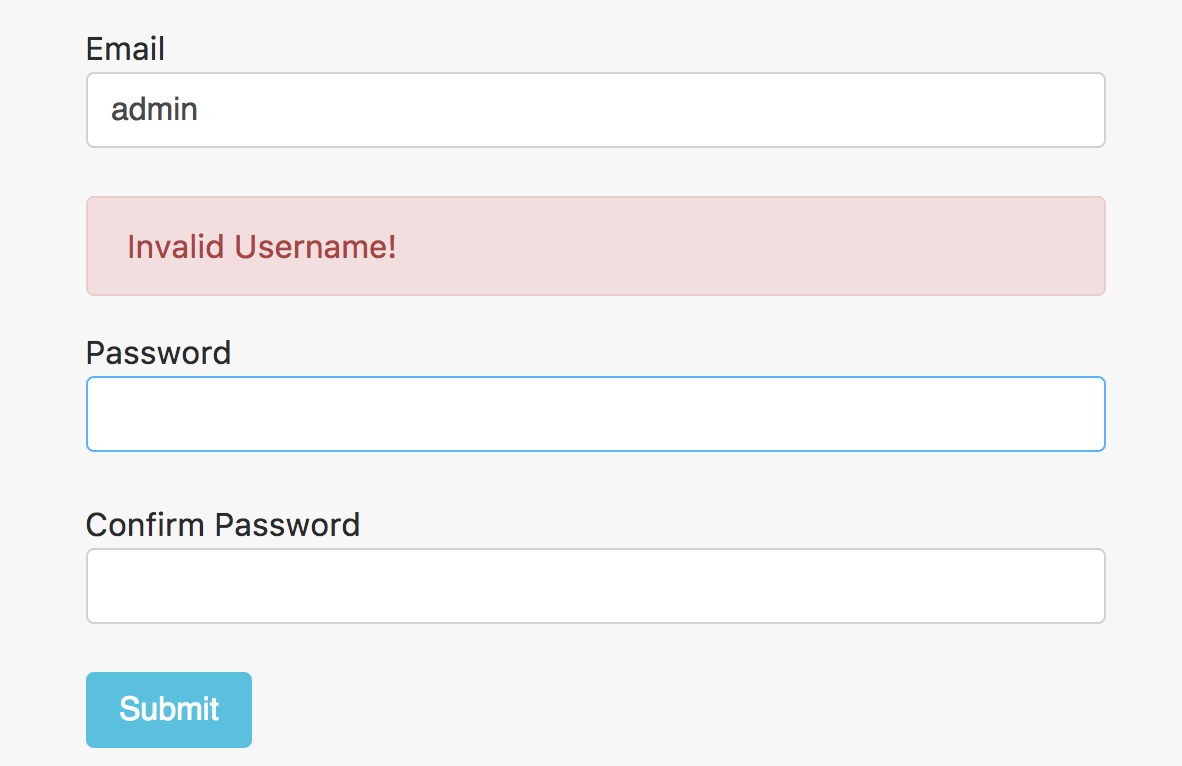
}Chúng ta kiểm tra xem username mà người dùng nhập vào có tồn tại trong danh sách giới hạn không, nếu có, chúng ta sẽ trả về 1 object chứa thông báo, ngược lại chúng ta trả về null để báo rằng người dùng nhập vào ok.
Ngoài template chúng ta đã có một thông báo lỗi nếu người dùng nhập lỗi như sau:
<div class="col alert alert-danger" role="alert"
  *ngIf="form.hasError('invalidusername', ['username']) &&
    form.get('username').touched">
  Invalid Username!
</div>
Lưu ý khi sử dụng AoT build:
form.hasError('code', 'path.to.control')AoT failure.
form.get('path.to.control').hasError('code')hoặcform.hasError('code', ['path', 'to', 'control'])AoT OK
Ở đây chúng ta sử dụng hasError để kiểm tra xem control nào đó có bị error hay không, mô tả của nó như sau:
/**
  * Returns true if the control with the given path has the error specified. Otherwise
  * returns false.
  *
  * If no path is given, it checks for the error on the present control.
  */
hasError(errorCode: string, path?: string[]): boolean { return !!this.getError(errorCode, path); }
Cuối cùng, chúng ta thêm vào phần khai báo danh sách validators cho control như sau:
{
  username: ['', [Validators.required, forbiddenUsername]]
}
3.2 Generic Format
Ở trong ví dụ trước chúng ta đã fixed cứng danh sách các username không được phép sử dụng, nếu bạn muốn Validator Function (VF) trên trở nên flexiable hơn thì có cách nào không.
Lúc này chúng ta có thể xây dựng một VF generic, nó cho phép người dùng nhập vào thêm đầu vào. Nhưng như trên chúng ta có nói đến format của function nhận AbstractControl, vậy phải làm thế nào để có thể truyển thêm đầu vào. Điều này dễ dàng có được với việc tạo 1 function trả về 1 function như sau:
export function forbiddenUsername(users = []) {
  return (c: AbstractControl) => {
    return (users.includes(c.value)) ? {
      invalidusername: true
    } : null;
  };
}

{
  username: ['', [Validators.required, forbiddenUsername(['admin', 'manager'])]],
}
Trong trường hợp này chúng ta dùng format của arrow function để nhìn gọn gàng hơn.
3.3 FormGroup Custom Validator
Với việc sử dụng FormBuilder, chúng ta hoàn toàn có thể truyền tương tự VF cho FormArray, nhưng với FormGroup có chút đặc biệt hơn. Do nó nhận đầu vào là một object để tạo các control tương ứng, nên nếu muốn validation cho một group chúng ta sẽ pass vào tham số thứ 2 một object như sau:
extra: {
  [key: string]: any
}

group(controlsConfig: {[key: string]: any}, extra: {[key: string]: any}|null = null): FormGroup {
  const controls = this._reduceControls(controlsConfig);
  const validator: ValidatorFn = extra != null ? extra['validator'] : null;
  const asyncValidator: AsyncValidatorFn = extra != null ? extra['asyncValidator'] : null;
  return new FormGroup(controls, validator, asyncValidator);
}
Rõ ràng, chúng ta cần một object với 2 keys validator hoặc/và asyncValidator.
Giả sử, chúng ta làm chức năng validate password và confirmPassword người dùng nhập vào phải giống nhau, lúc này validate cho cả group pw sẽ là một giải pháp đơn giản hơn.
export function comparePassword(c: AbstractControl) {
  const v = c.value;
    return (v.password === v.confirmPassword) ? null : {
      passwordnotmatch: true
    };
}

pw: this.fb.group({
  password: ['', Validators.required],
  confirmPassword: ['', Validators.required]
}, {
  validator: comparePassword
})
Và template sẽ giống như sau:
<div class="col alert alert-danger" role="alert"
  *ngIf="form.hasError('passwordnotmatch', ['pw']) &&
    form.get('pw').touched">
  Password does not match!
</div>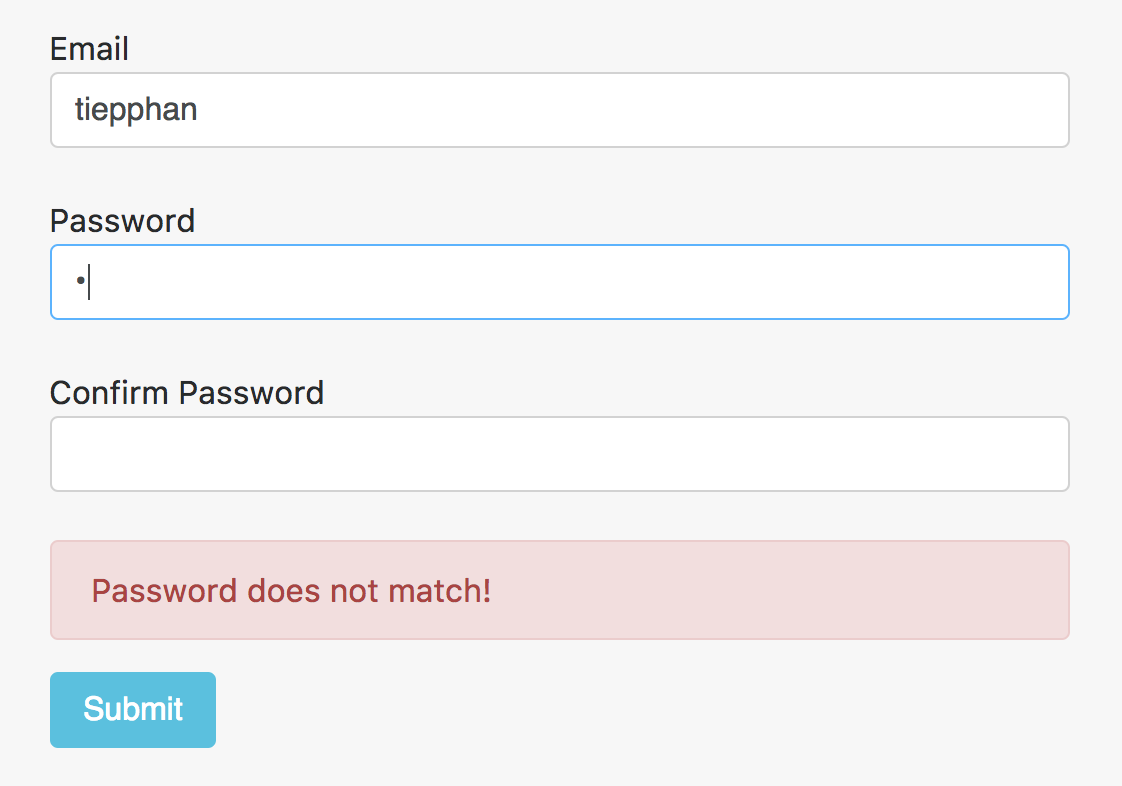
4. Validation Cho Template-driven Forms
Việc validation cho Reactive Form trong Angular rất dễ dàng, bạn chỉ cần tạo một VF là có thể sử dụng được. Vậy còn với Template-driven Forms thì sao.
Câu trả lời là bạn sẽ phải tạo một Directive để thực hiện validation.
Và Directive sẽ cần cài đặt interface như sau:
export interface Validator {
    validate(c: AbstractControl): ValidationErrors | null;
    registerOnValidatorChange?(fn: () => void): void;
}
// or
export interface AsyncValidator extends Validator {
    validate(c: AbstractControl): Promise<ValidationErrors | null> | Observable<ValidationErrors | null>;
}
Nếu bạn dùng Angular CLI có thể chạy lệnh để tạo Directive, nó sẽ tạo directive và update NgModule để có thể sử dụng directive vừa tạo.
Giả sử chúng ta tạo Validation cho forbidden username như ví dụ trước.
ng g d forbidden-usernameDirective mà chúng ta cần sẽ có dạng như sau:
export const FORBIDDEN_USERNAME_VALIDATOR: Provider = {
  provide: NG_VALIDATORS,
  useExisting: forwardRef(() => ForbiddenUsernameDirective),
  multi: true
};

@Directive({
  selector: '[forbiddenUsername][ngModel]',
  providers: [
    FORBIDDEN_USERNAME_VALIDATOR
  ]
})
export class ForbiddenUsernameDirective implements Validator {
  constructor() { }
  validate() {
    // logic here
  }
}
Đầu tiên, chúng ta phải đăng ký validator directive của chúng ta với Angular thông qua việc khai báo thêm directive vào token NG_VALIDATORS, lúc này Angular mới nhận biết được và thực hiện validate cho form control.
Nếu bạn nào chưa tìm hiểu về Dependency Injection và Multi-provider trong Angular, bạn có thể trở lại bài 16 trong series để tìm hiểu thêm.
Ở trong phần selector của directive, chúng ta sử dụng property selector giống như trong CSS, ở đây chúng ta đảm bảo rằng chúng ta đang thao tác trên form control nào đó, do đó chúng ta ghép thêm với [ngModel].
4.1 Implementation
Bây giờ chúng ta sẽ cài đặt directive như sau:
private _users = [];
@Input()
get forbiddenUsername() {
  return this._users;
}

// cho phép người dùng truyền vào rỗng, array, string
set forbiddenUsername(value: string | Array<string> | null) {
  if (typeof value === 'string') {
    this._users = value.split(' ');
  } else if (Array.isArray(value)) {
    this._users = value;
  } else {
    this._users = [];
  }
}

validate(c: AbstractControl) {
  return this._users.includes(c.value) ? {
    invalidusername: true
  } : null;
}
Sau khi có phần login xử lý, chúng ta chỉ việc thêm directive vào template:
<form #form="ngForm" (ngSubmit)="onSubmit(form)"
  class="col-md-6 offset-md-3">
  <div class="form-group row">
    <label class="col">
      Email
      <input type="email" class="form-control" ngModel name="username"
        forbiddenUsername="admin manager" #emailAdd="ngModel">
    </label>
  </div>
  <div class="col alert alert-danger" role="alert"
    *ngIf="emailAdd.errors?.invalidusername && emailAdd.touched">
    Email is invalid!
  </div>
  <div ngModelGroup="pw" #pw="ngModelGroup">
    <div class="form-group row">
      <label class="col">
        Password
        <input type="password" class="form-control" ngModel name="password">
      </label>
    </div>
    <div class="form-group row">
      <label class="col">
        Confirm Password
        <input type="password" class="form-control" ngModel name="confirmPassword">
      </label>
    </div>
    <div class="col alert alert-danger" role="alert"
      *ngIf="pw.errors?.confirmPassword && pw.touched">
      Password does not match!
    </div>
  </div>
  <div class="form-group">
    <button class="btn btn-info" type="submit">Submit</button>
  </div>
</form>
Tận hưởng thành quả thôi nào.
4.2 Register Validator OnChange
Sẽ thế nào nếu đầu vào của directive thay đổi, liệu nó còn validate đúng cho chúng ta, giờ hãy đổi một chút:
Thêm 1 button để thêm hoặc xóa admin khỏi list không cho phép
<button class="btn btn-primary" type="button"
  (click)="toggle()"
>
  Toggle validate admin
</button>

<input type="email" class="form-control" ngModel name="username"
        [forbiddenUsername]="list" #emailAdd="ngModel">
Và code trong Component:
list = ['admin', 'manager'];

toggle() {
  const el = 'admin';
  if (this.list.includes(el)) {
    this.list = this.list.filter(x => x !== el);
  } else {
    this.list = [...this.list, el];
  }
}
Khi chạy thử chúng ta có thể thấy rằng, nếu người dùng nhập vào admin rồi focus sang một chỗ khác, error thông báo sẽ hiện ra, nếu người dùng click vào button để xóa admin khỏi list thì error không biến mất, điều tương tự khi người dùng tắt validate cho admin, sau đó nhập vào admin và bật validate trở lại thì error không hiện như chúng ta mong muốn. Vậy có phải chúng ta đã bỏ qua điều gì không.
Câu trả lời là khi thực hiện thay đổi đầu vào, chúng ta cần update lại trạng thái của form/control. Có một phương pháp đó là bạn implement thêm method:
registerOnValidatorChange?(fn: () => void): void;Và phiên bản code cuối cùng của chúng ta sẽ có dạng:
export const FORBIDDEN_USERNAME_VALIDATOR: Provider = {
  provide: NG_VALIDATORS,
  useExisting: forwardRef(() => ForbiddenUsernameDirective),
  multi: true
};

@Directive({
  selector: '[forbiddenUsername][ngModel]',
  providers: [
    FORBIDDEN_USERNAME_VALIDATOR
  ]
})
export class ForbiddenUsernameDirective implements Validator {
  private _users = [];
  private _onChange: Function;
  @Input()
  get forbiddenUsername() {
    return this._users;
  }

  set forbiddenUsername(value: string | Array<string> | null) {
    if (typeof value === 'string') {
      this._users = value.split(' ');
    } else if (Array.isArray(value)) {
      this._users = value;
    } else {
      this._users = [];
    }
    if (this._onChange) this._onChange();
  }
  constructor() { }

  validate(c: AbstractControl) {
    return this._users.includes(c.value) ? {
      invalidusername: true
    } : null;
  }
  registerOnValidatorChange(fn: () => void): void {
    this._onChange = fn;
  }
}
Ý tưởng là đầu vào thay đổi, thì sẽ thực hiện chạy một hàm nào đó để thực hiện việc update state cho form/control.
Bí mật ở đây là những directives này thực thi đoạn code sau đây:
// re-run validation when validator binding changes, e.g. minlength=3 -> minlength=4
dir._rawValidators.forEach((validator: Validator | ValidatorFn) => {
  if ((<Validator>validator).registerOnValidatorChange)
    (<Validator>validator).registerOnValidatorChange !(() => control.updateValueAndValidity());
});
5. Bonus - Validator Directive Confirm Password
Dưới đây là một directive để thực hiện kiểm tra password của người dùng nhập vào có giống nhau không. Logic sẽ được áp dụng cho ngModelGroup và có chút tùy biến để có thể cập nhật trạng thái của group.
export const CONFIRM_PASSWORD_VALIDATOR: Provider = {
  provide: NG_VALIDATORS,
  useExisting: forwardRef(() => ConfirmPasswordDirective),
  multi: true
};

@Directive({
  selector: '[ngModelGroup][confpass]',
  providers: [CONFIRM_PASSWORD_VALIDATOR],
  host: {'[attr.confpass]': 'confpass ? "" : null'}
})
export class ConfirmPasswordDirective implements Validator, OnChanges {
  private _cfPassword: boolean;

  private _control: AbstractControl;
  @Input()
  get confpass() {
    return this._cfPassword;
  }
  set confpass(value: boolean) {
    this._cfPassword = value != null && value !== false;
    if (this._onChange) this._onChange();
  }
  constructor() { }
  private _onChange() {
    if (this._control) this._control.updateValueAndValidity();
  }
  ngOnChanges(changes: SimpleChanges) {
    if ('confpass' in changes) {
      if (this._onChange) this._onChange();
    }
  }

  validate(c: AbstractControl) {
    this._control = c;
    const v = c.value;
    if (this.confpass) {
      if (v.password == v.confirmPassword) {
        return null;
      } else {
        return {
          confirmPassword: {
            notMatch: true
          }
        };
      }
    }
    return null;
  }
}
6. Video bài học
Angular Form Validation - KARA ERICKSON - NgConf 2017
7. Tham khảo
Reactive Forms documentation: https://angular.io/docs/ts/latest/guide/reactive-forms.html
Github Angular: https://github.com/angular/angular/blob/4.3.x/packages/forms/src/directives/validators.ts
Git repo: https://github.com/tieppt/try-angular/tree/lesson-19